As a remote team, Slack, the messaging app, is a key part of our daily life here at Resource Guru. As our central communications hub we use Slack to discuss work, share photos, and keep track of notifications from tools like Trello.
We plan to release an official Resource Guru – Slack integration in the future, but in the meantime I wanted to show you how you can combine Resource Guru’s leave management functionality with our new Zapier integration to send sick leave booking notifications directly to Slack.
The Zap will send a notification to a Slack channel when a new “Sick Leave” time off booking is created. This gives us a quick way to inform the the team when we are going to be short a member, and gives us the opportunity to make any booking adjustments necessary to keep our projects in line.
Note: You will need to be on a paid Zapier plan to set a multi-step Zap live.
This multi-step Zap will be a 3 part process:
- Setup Resource Guru’s “New or Updated Time Off Trigger” in Zapier to capture time off booking data.
- Use Zapier’s “Filters” app to check that the booking’s time off type is “Sick Leave”.
- Post the sick leave booking notification to our Slack channel.

“Resource Guru has significantly improved our visibility, boosting project ownership and forecasting ability.”

In this article 📖
Creating the Zap
Head over to Zapier and either sign up for a new account or log in to your existing account. From your Dashboard click “Make a Zap!” button. Search for “Resource Guru”, and select “New or Updated Time Off” as your trigger. If this is the first time you’ve used Resource Guru with Zapier then you will be asked to connect your account.
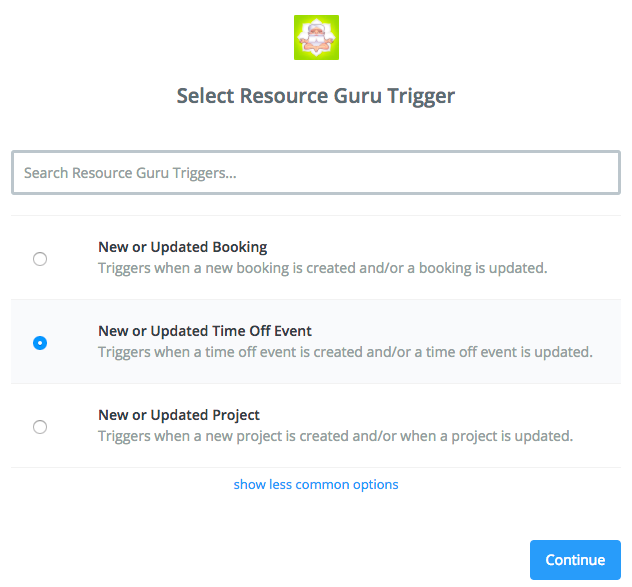
Follow the instructions on screen and then click through to the test screen to check that the trigger is working. If you have trouble, open up your Resource Guru schedule and make sure that you have a recent time off booking of “Sick Leave” type, then return and try the process again.
Adding A Filter
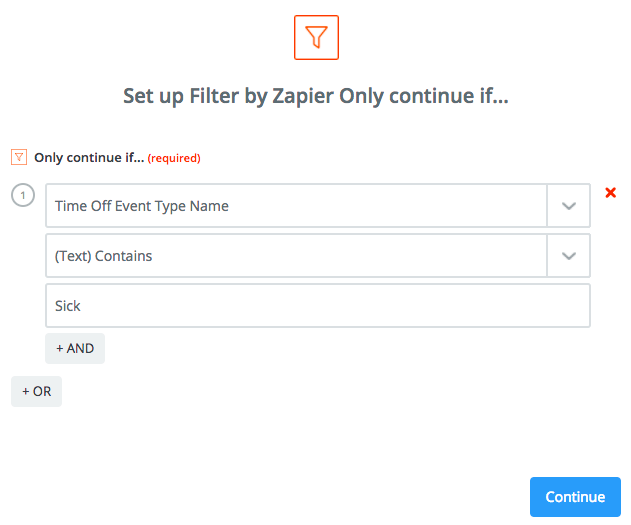
It’s now time to create the second step of the Zap, an “Action” filter that will ensure only “Sick Leave” bookings are sent to Slack.
On the left side of the screen select Action, then “Choose App” and find “Filter by Zapier”.
Select the next option and you’ll be taken to the setup for the filter. Fill out the fields as per the screenshot below:
Now we can test this step:
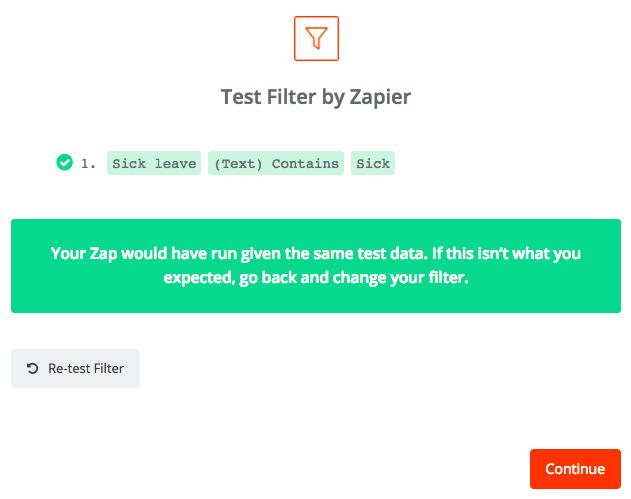
If it worked correctly then click to continue.
Now it’s time to setup the final action. Click “Add a Step”, search for Slack and then select “Send Channel Message” from the list of options.
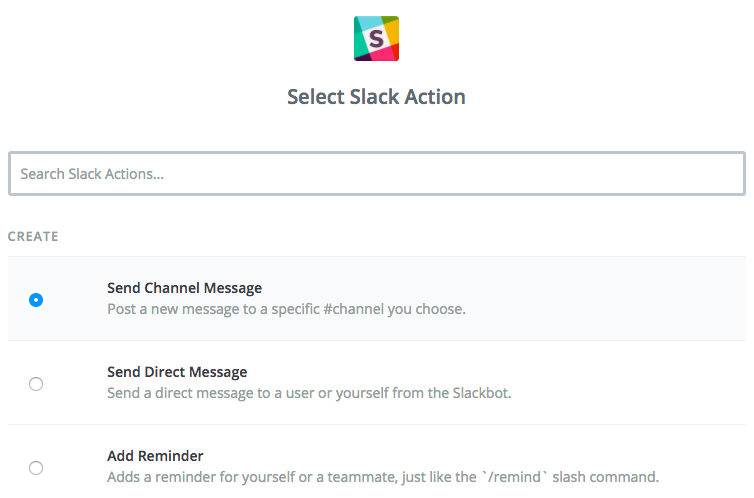
If you need to connect Zapier to your Slack account then you’ll be asked to do so at this point so follow the instructions provided.
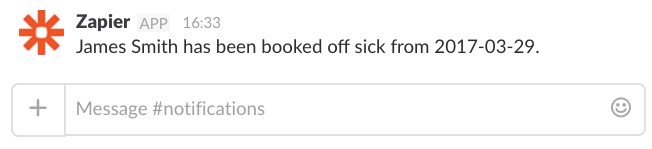
We can now finish up the Zap by setting up the Slack message in a similar manner to the screenshot below. While I have selected the “Notifications” Slack channel in this example, you can choose the channel that is appropriate for you.
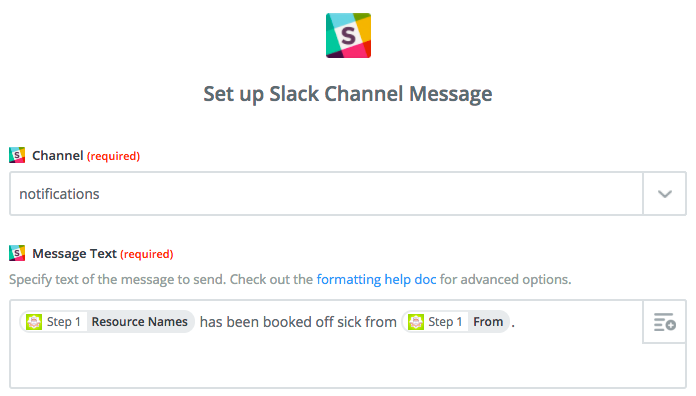
Feel free to edit the “Message Text” field to suit your particular requirements.
When you’ve finished setting up Slack, click “Continue” and you’ll be able to test your Zap. If it’s setup correctly then you’ll see a test notification appear in your selected Slack channel.
You can now finish things off by clicking “Finish”, giving your Zap a name and setting it’s status to “On”.
Success! From now on, whenever a new sick leave time off booking is created you will automatically see a notification in your Slack channel.
If you’re interested in exploring more ways that Resource Guru can connect with your favorite apps then make sure to check out our Zapbook.